Joseph and reading
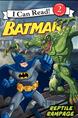
Joseph continually surprises us with his reading ability today head to me “Batman: Reptile Rampage.” Which is level 2 in the “I Can Read!” series but level 3 in the ATOS book level. He also read to me “Henry and Mudge and Mrs. Hopper’s House.” Which is also level 2 in the “I Can Read!” series but level 2.8 in the ATOS book level. I prefer to use AR level as a guide as I find it a better guide to compare against different books. This is pretty amazing to us because Joseph won’t enter Pre-K until next year.
Some of the things that I think have helped Joseph with his reading are:
- We read at least two books to him daily before bed time. These books come from his collection at home (that we mostly got for free) and from library books we trade out every few weeks on Monday night. We also read him a few scriptures every night that also gives him some more advanced reading exposure.
- PBS shows like Word World, Word Girl and Super Why. Sure gluing his face to the TV wouldn’t be good but when he does watch a show I feel programming like this does very well at exposing children to reading and new vocabulary.
- Video Games. Your probably saying to yourself wait, “video games”? Yes, video games have helped encourage him to read and sound out new words. Sure some games don’t require reading but RPG’s like Twilight Princess pretty much require it and he really wanted to read all the text boxes from the villagers. I just modeled it a bit for him (played) and he wanted to be just like dad reading and playing.
At any rate, I thought I’d just share with others what worked with my family for encouraging my son to read. I hope this is helpful to someone else.
Joseph and reading Read Post »