D&D 4e Summary – Session 20
I’m going to use a video summary this time around.
3 XP for the night.
54 total experience.
D&D 4e Summary – Session 20 Read Post »
I’m going to use a video summary this time around.
3 XP for the night.
54 total experience.
D&D 4e Summary – Session 20 Read Post »
We start this game in the Seven Pillared Hall. When we last left our adventurers, they had just returned with the slaves they had liberated from the Horned Hold. Among them was Sage and Delia Greyrood but Rena and Doty are still missing. From the other slaves you rescued you learned that Rena and Doty had been carried off by some Gnolls.
Later at the inn the goblin you rescued delivers a letter he was paid to deliver from a shadowy figure. The letter reads as follows:
Your actions against the duergar are commendable. I am in a
position of power in the evil organization behind the duergar’s
actions, and I wish to help you defeat my comrades. I have been
seeking a way out of the organization, and I believe you can help
me. Follow the attached map so that we can meet in secret.
The map shows a small chamber off the Road of Shadows just outside the Seven-Pillared Hall. You figure it’s likely to be a trap but you decide to walk in anyways.
When you arrive at the location indicated on the map. It is a natural
cave with a 10-foot-high ledge that runs around its interior
perimeter. Several large boulders crowd the area. At first, there’s
no sign of anyone waiting to greet you, but then suddenly creatures
spring out of hiding and attack. It’s a trap!
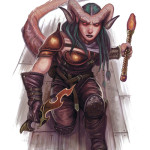
 In the ambush two Tieflings fling fire at you while a Bronze Warder (Construct) pushes a large boulder to block the entrance and crush any in its way. The group wisely beats the Tieflings into unconsciousness and the Bronze Warder deactivates. Cleaning up the area one Tiefling is dead and the other is revived for questioning. The Tiefling says that a fate worse than death awaits her if she reveals anything and refuses to tell you how to use the command bracelet for the Bronze Warder. She then foams at the mouth as she has taken a magic poison capsule. You strip the bodies of valuables, the command bracelet and find some scrolls.
The first scroll reads:
I don’t care how you do it, but deal with these adventurers. Take
one of the bronze warders if you must. If they remain in the
Labyrinth, they could disrupt my plans. Once you’ve dealt with
them, deliver their bodies to our gnoll friends, along with the
enclosed scroll.
Paldemar
One of the scrolls has a wax seal bearing an ornate letter “P.” The scroll reads as follows:
To Maldrick Scarmaker, Exalted Chieftain of the Blackfangs and
Chosen of Yeenoghu: Paldemar offers you the corpses of these
champions as a gift of ongoing friendship, that our arrangement
might continue to be mutually beneficial. May you savor their
blood.
Your friend and ally,
Paldemar
The final scroll bears a map of the Labyrinth that has directions to the Well of Demons, which is circled and marked with the word “Blackfangs.”
The Well of Demons
The Well of Demons was once a monastery dedicated to Baphomet, demon lord of berserkers, destruction, and mindless fury. The minotaurs of the Labyrinth worshiped Baphomet above all other gods, devils, and demons. The Well of Demons was an isolated complex used by Baphomet’s priests to test those who wished to gain the demon lord’s greatest blessings.
The group heads to the Well of Demons to free their remaining friends and family. As you near the entrance you see:
You see a large, square chamber. Five columns, three set near the room’s corners and two in the middle of the chamber, rise up 15 feet to the ceiling. Each column has the face of a leering, fanged minotaur carved onto it. You notice a well in the southeastern corner of the room, and one passage leads away to the east.
The columns speak a few seconds after a creature enters the room. A listener hears the message in his or her native tongue, spoken in the deep tones of a powerful minotaur:
Greetings, seekers of Baphomet’s boundless glory.
Those who prove unworthy of his attention
Shall be claimed forever as his slaves.
Those who prove worthy
Shall be granted power beyond mortal reckoning.
Mask, bell, blade, and tome
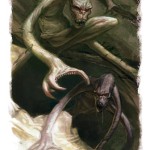
 You see some creatures skulking behind the columns. Shawna runs in and shoots but then has creatures reach out long arms on both sides to choke her. Everyone else runs in and helps defeat the Cavern Chokers, Ghoul and Phalagar inside that were waiting as a greeting party.
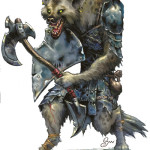
 Heading to the east you find a door and after listening you hear the yipping sound of some Hyenas far on the other side of the room. Quinn, Shawna and Ket sneak in using stealth to achieve a surprise for some Gnolls dicing in a room near the door. The Gnolls cry out alarm and the Hyenas are released to join the attack, along with their Huntmaster. A hail of arrows, a blast of fire and some hard hitting attacks quickly make the group fall to your onslaught. At the end of the fight you take a short rest and loot the area.
During the rest Kitsune is fiddling with the command bracelet when it pops open again. It had previously opened and then closed upon the death of the previous owner. Kitsune instinctively places the bracelet on her wrist after which it closes without leaving a seam.
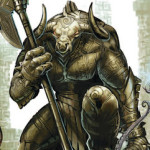
 You suddenly hear a loud thunder as if a herd of bison was heading down the hall. The Bronze Warder charges into the room, as you lift your weapons the Warder comes to a halt and kneels. With it’s monstrous head bowed before Kitsune it says, “COMMAND ME!”
3 XP for the night.
The next game we will just switch to your level six characters.
D&D 4e Summary – Session 19 Read Post »
So after defeating the Orcs and Ogre you have a door to the North and a door to the East. As you are considering them Shawna shows up again. She has a change of hairstyle, new armor and tattoo. I guess you all figure she went to the Day Spa or something. After asking a bunch of questions and getting brought back up to speed, you decide to head east.
You listen at the East door and hear a dwarf ranting to a bunch of other dwarves. He is haranguing another person, using words such as lazy, unfit, and weak. He goes on to speculate that, if the clan wasn’t riddled with doubt and weakness, they wouldn’t be so beholden to the Mages of Saruun.
You all decide to break up his verbal assault with an assault of your own. Smashing into the battle two Duergar become large sized and an annoying one keeps casting his own version of a fireball and a poisonous clod. You also have a loud mouthed one that is really hard to beat down. After finally beating him down… you heal him back to consciousness and question him. You find out that he is Murkelmor the appointed leader of Clan Grimmerzhul in the Horned Hold. While questioning him you hear harsh, hissing laughter through the door to the North.
“Look, Durkkel,” one voice says. “It doesn’t like me! Should I be afraid?”
“It needs to learn some respect, Marshk,” another voice replies. “If I pluck out one of its eyes, it might think twice about glaring at you.”
 That’s about when Ket starts running to the door and telling the others to attack before he harms one your family members.
Through the door you see an expansive chamber that contains three large wells. One holds a pool of water, but two are simply deep pits with ladders leading down. A large brazier full of coals sits near a rubble pile in the southeastern part of the chamber. Three gray dwarves stand
guard here, along with two humanoid creatures with lashing tails and bodies covered in sharp spines.
The spine covered devils fly above the pits to try to rain attacks from relative safety but all the groups range attackers prove this to have been a false hope and combine fire to quickly kill them. The remaining Duergar while tough… are defeated without incident.
Inside the pits you find 14 slaves chained to the walls. Of them two are villagers from Winterhaven which are Sage (Lavender’s Brother) and Delia Greyrood (Sister to Lord Paedrag’s wife. There are also five towns people from Fallcrest and six from the Barony of Harkenwold to the south. There is also a bitter goblin that was sold by the Bloodreavers even though he was a member of their clan, just to pay some of his gambling debts. Of the Winterhaven villagers Dotty (Quinn’s older sister) and Rena (Ket’s sister) are still missing. After some questioning you find some out that Gnolls on behalf of Paldemar came and took the other two villagers away.
Returning back to the Seven Pillard Hall a small procession of children and townsfolk ask questions about the rescued slaves. You are able to find rooms at the Inn for everyone but while you stay for free they have to charge for the guests. The party collectively helps pay the stay for the rescued slaves. While the Inn is full the rescued goblin brings you a message, someone paid him to deliver.
Your actions against the duergar are commendable. I am in a position of power in the evil organization behind the duergar’s actions, and I wish to help you defeat my comrades. I have been seeking a way out of the organization, and I believe you can help me. Follow the attached map so that we can meet in secret.
The message goes on to ask you to arrive early the next morning.
To be continued the next game…
2 XP for encounters
1 XP for rescuing most of the slaves
That brings your total to 48, bringing you close to level 6.
D&D 4e Summary – Session 18 Read Post »
Your here to kick some Duergar and chew bubblegum and your all out of bubblegum.
Continuing on your storming of the Duergar fortress you start checking doors and then killing the occupants on the other side. In the next room it’s a surly blacksmith, his apprentices and some Orc thralls. While the blacksmith would have loved smashing your heads in, you did a great job taking him out of the fight. The more annoying part was his apprentices that kept cloaking after attacking your group but you all took them out also. After looting the room and bodies you moved on to the next area.
 In the next fortified room you run across an ill tempered individual named Rundarr and his guards bossing around some human slaves. You don’t trust the slaves so you block the door. And precede to annoy the DM by completely locking down his BBG with dazes and immobilizing him. Oh and it really annoyed Rundarr also. He tried going giant size and hulk smashing but he just couldn’t get near enough to you all. While that is going on two Duergar try to sneak up on the back end of the group. Lavender acts as rear guard and keeps them pinned into the hallway with her pets and later Ket helps dispatch them. At the end of the battle you confirm that the slaves are in fact slaves from Fallcrest. You provide them an escort back to the Seven Pillared Hall and rest in the Inn.
 In the morning you find Shawna’s room vacant. After a careful search, all you find is a dart with a tranquilizer on it. You all search the Hall and ask questions but can’t find any answers. You resolve that maybe the slavers took her in the night as revenge.
So you head back to the Horned Hold to kill some more Duergar and ask questions.
Getting back you find the portcullis blocked again. After some judicious use of fire, arrows and lock picking you storm back in. You carefully move through the fortress but meat no resistance until you reach a previously locked door. After sneaking down the hall past it you come to another door with arrow slits. Behind the door are two Arbalesters (steam punk like crossbow on mechanical legs) and some more Duergar. You smash through the defenders and cut, burn and shoot them to shreds. After killing all the Duergar, you loot the rooms and find more gems and magical treasure.
 Moving on from there you hear someone speaking in the room to the north west. After running in you find a pissed off Ogre mad at missing the joke his Orc friends made. So he attempts to take the frustration out on you… it doesn’t go so well. Sure he has some reach but the FIREBALL, hail of arrows and other nastiness makes this a quick battle for you.
Experience Earned: Total 6
5 from combat, 1 from accumulated skill challenges/role play.
This brings your overall total XP to 45 and you are currently at level 5.
D&D 4e Summary – Session 16 & 17 Read Post »